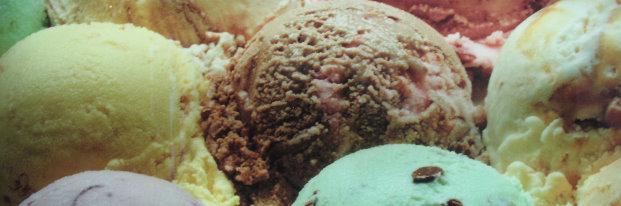
I was really excited when you picked this to be the next recipe. Peanut butter is a very versatile flavor that is easy to make into a bunch of different tasty teats. Chocolate, bananas, marshmallow, granola, honey, and jelly are some of the best add-ins. I was originally going to make a peanut butter ice cream sandwich. Fortunately for you, a dessert I was supposed to make last weekend that never materialized left me with 4 pints of strawberries. So my plan was to make some sort of peanut butter and jelly flavor. Yesterday morning in the shower I was lamenting that I if made the PB&J flavor I wouldn’t be able to make ice cream sandwiches. Then it hit me, why not put the sandwich inside of the ice cream? Mrs. Fellow loved the flavor idea and immediately began directing my effort. So today’s flavor is peanut butter ice cream with jam sandwich pieces. Ben and Jerry would be proud. I am happy to report that this flavor will knock your socks off. You won’t believe that something so mundane as a PB&J can be transformed into this masterpiece.
I made my own strawberry jam for this recipe. Make your own jam with your favorite fruit flavor. Store bought jam will also work, but you do have to thicken it more. Simmer it on the stove to reduce its volume. It should be so thick that you have trouble removing the cooled jam from the container. This helps concentrate the flavors. More importantly, it allows you to really pile on the jam in the sandwiches without it oozing out of the sides during pressing.
As for the bread, plain supermarket white bread is what is best to use. Sunbeam, Pepperidge Farm, and Sara Lee brands are good choices. Avoid bread that is too crusty because it makes it more difficult to press the sandwiches. I recommend leaving a small gap between the jam and the edge of the bread. This will help avoid the sticky mess if the jam oozes out when the sandwich is pressed. I also recommend removing the crusts when cutting the sandwiches into bite sized pieces because jam coverage is not uniform at the edges. Besides, isn’t it mandatory to remove the crusts from your PB&J?
Lastly, I tested this recipe three ways – untoasted bread, toasted bread, no bread. All three were outstanding, but none of the tasters could differentiate between the toasted and untoasted bread versions. The thick jam made a difference. It is nearly chewy when frozen and was a nice textural compliment to the ice cream.
May 1, 2008 UPDATE: After being in my freezer for a few days, this ice cream has become very hard. I don't think I have ever made one that is this difficult to scoop. You may want to thaw it for a few minutes on the counter before serving it.
Peanut Butter and Strawberry Jam Sandwich Ice Cream:
For the Jam:
4 pints of strawberries
3 cups sugar
1 generous tablespoon lemon juice
1. Wash and hull the strawberries. If any berries are too large, cut them into smaller pieces.
2. Put the berries, sugar, and lemon juice into a saucepan. Stir frequently until the sugar becomes liquid.
3. Simmer this stuff for about 30 minutes. The temperature should eventually get to more than 24o F.
4. Remove from the heat and cool.
This makes about 2.5 cups of super concentrated jam. Extra jam can be frozen or canned.
The sandwiches:
6 slices white bread
Jam
1. If the jam has totally cooled, briefly warm it in the microwave to loosen it a bit; it should be still be thick, but easier to spread.
2. Make sandwiches using generous amounts of jam. Be sure to leave ¼ inch border on the bread.
3. Put the sandwiches in aluminum foil and cover loosely. Using a heavy bottomed skillet or saucepan press the sandwiches to reduce their thickness.
4. Cover tightly and place the sandwiches in the freezer for at least 4 hours.
5. Remove the sandwiches from the freezer and cut off the discard the crusts. Cut the remaining sandwiches into ¼ - ½ inch squares. Return the pieces to the freezer for another hour or two.
For the ice cream:
2 cups whole milk
2 cups cream
6 egg yolks
¾ cup of sugar
½ teaspoon of vanilla
¾ cup peanut butter
1/8 teaspoon of salt (optional)
1. Pour the milk and cream and half of the sugar into a pot and bring to a slight simmer stirring occasionally.
2. As the milk and cream are heating, place the egg yolks into a bowl with the sugar (and salt if using) and beat until it is a pale, frothy liquid.
3. Once the milk/cream mixture is simmering, remove them from the heat and temper the egg mixture by adding a small amount of the hot milk/cream and stirring thoroughly. Repeat this process a couple of more times to ensure that the eggs have warmed up. You should use about 1/3 of a cup of hot cream mixture in total. 4. Then pour the complete egg mixture into the cream pot.
5. Return the pot to the heat and stir constantly until the custard reaches 175F.
6. Remove the pot from the heat and stir in the vanilla and peanut butter.
7. Cool the custard to room temperature and then refrigerate overnight.
8. Freeze in your ice cream machine. Add sandwich pieces in the last minute of the freezing process. If you opt to skip the bread and instead use just the jam, than create small blobs of jam and put them into the ice cream after it comes out of the ice cream machine. This is when the ice cream is still in its soft serve stage. If it gets too hard, do not worry, you can put some ice cream in a freezer container, put down a layer of jam, then more ice cream, then more jam, then more ice cream. This will create a ripple effect when the ice cream is scooped.
Subscribe to:
Post Comments (Atom)

No comments:
Post a Comment